Work continues on the ultralight UAS build. This Friday I opened a fresh Onshape project and started modeling from the ground up. My guiding mantra: Simple parts, simple parts list, complex assembly. Translation: I want to keep every individual shape dead simple, minimize the number of unique geometries, and then let the clever reuse of those shapes drive the complexity. If I can design a balsa airframe to “flat pack” and glue together like a 3D puzzle… just how small and ultralight can I actually go?
On the CAD side: I'm genuinely pleased with Onshape. After 20+ years of SolidWorks — both professionally and personally — that's my “drawing right-handed” muscle memory. But I'm getting pretty savvy with my left hand now, too. What I can't overstate is how critical Onshape's part/design space paradigm feels. It's a fundamental shift, and for a project like this, where every gram and every repeated part counts, it's already proving its worth.
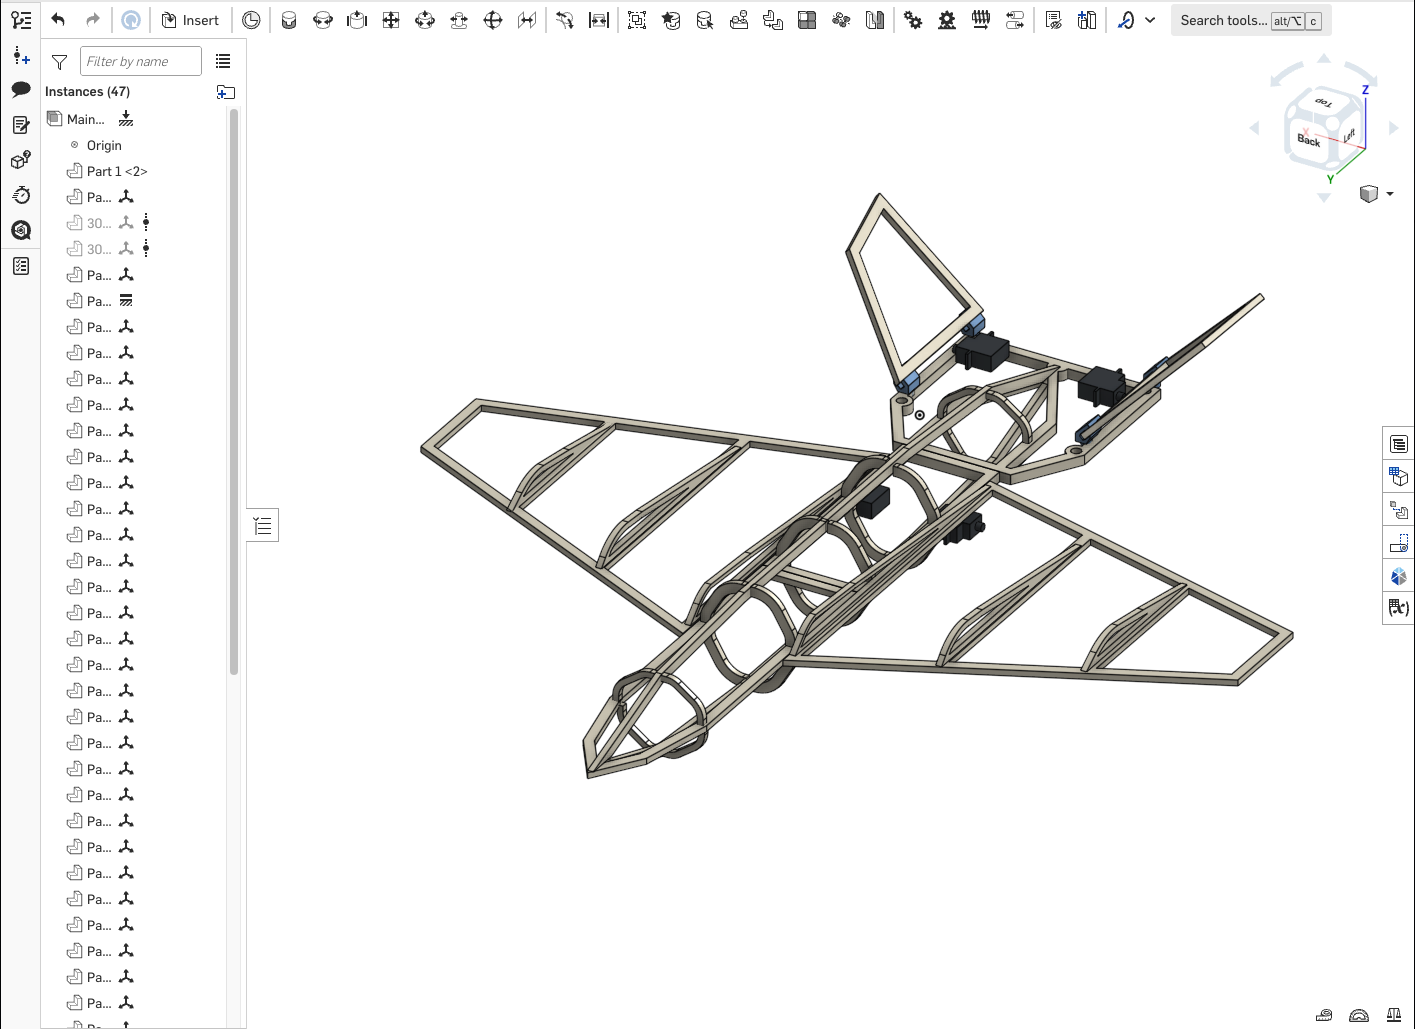
📐 Onshape First Look
The project opened with a clean part studio. Every rib, former, and spar is a standalone part — but they're all derived from a handful of base sketches. The real win is using configurations to stamp out multiple instances without bloating the feature tree. This is the “complex assembly” part of the mantra.
Now for the hard part: drawing packages and figuring out manufacturing. I don't own a laser cutter, and I don't have a buddy with one either, so my first batch of production files needs to be dialed in before I walk into a professional shop. That means prototyping by hand, old-school style. I do have access to a Cricut, and I can cut vinyl stickers with it. Right now I'm deep in the weeds figuring out whether that tool can genuinely help the build — maybe as a mask for etching, maybe as a stencil, maybe something else entirely — or if I need to pivot to alternative methods that better fit this manufacturing “style.”
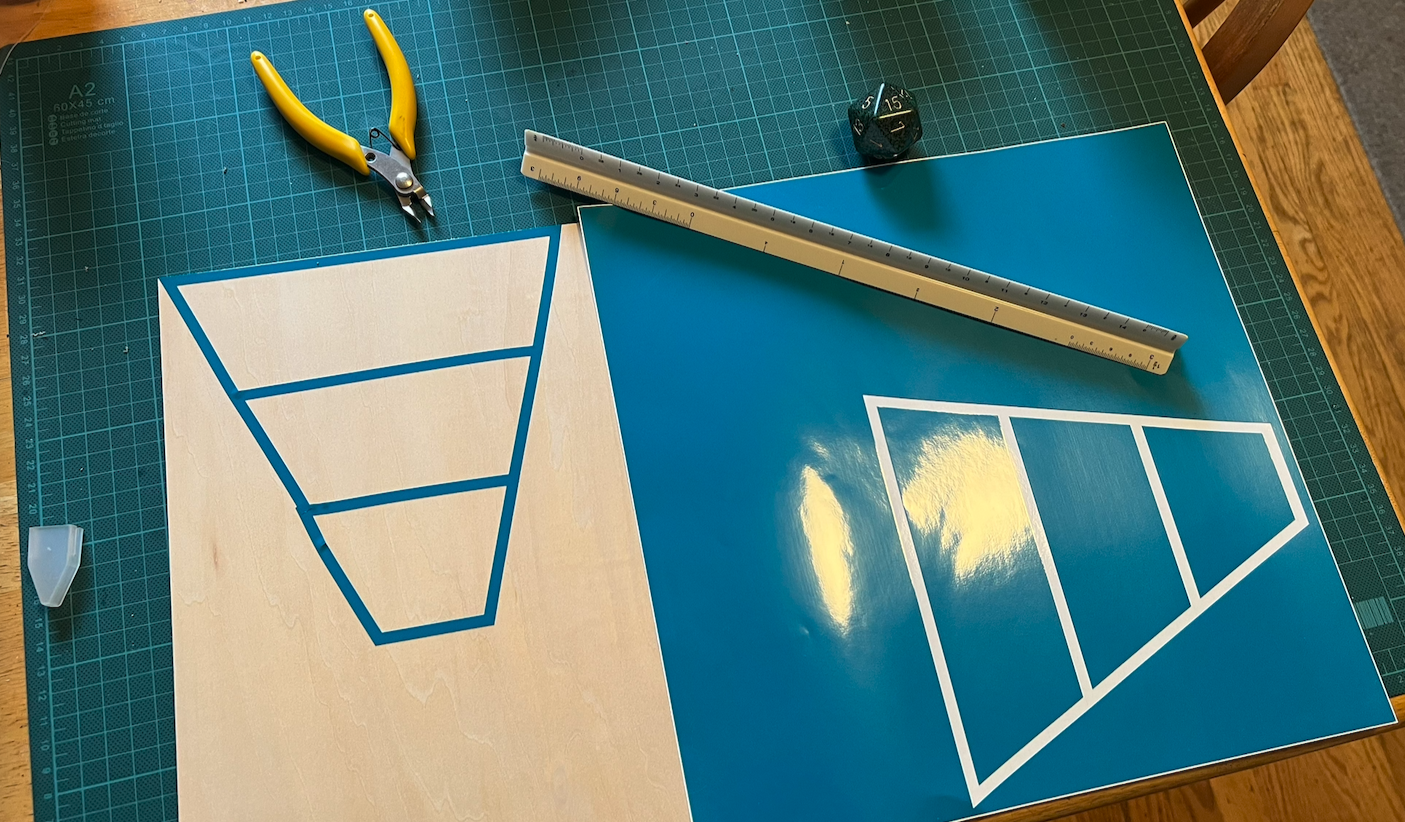
🧩 Cricut Experiment
The vinyl sticker you see is a test piece: can we use the Cricut to cut precision masks for laser‑like details? Or maybe even cut thin cardstock templates to trace onto balsa? Early results are promising — the registration is clean, and the adhesive holds well enough for layout marks. Next step: see if it can handle 1/32" ply with multiple passes.
Idea: If the Cricut can cut lightweight chipboard, we could iterate airframe prototypes at home before sending final DXF to a pro laser service.
Airframe
- ~27 g bare structure
- 425 mm overall length
- Balsa + basswood ply
- Parchment skin (yes, really)
Design Ethos
- Simple parts list
- Reuse shapes aggressively
- Flat‑pack friendly
- Hand‑tool buildable
Target Gear
- 1104 6500kV motor
- 2S 450mAh LiHV
- Micro Rx + 5.8G VTX
- 4x 2.5g servos
Flat‑Pack Obsession
All structural parts nest onto two 12"x12" sheets of 3/16" basswood ply. Add four 3/16" square balsa rods (longerons + spars) and parchment. That's the entire BOM. The whole airframe costs less than a craft beer flight.
• 2x 12"x12" basswood ply (3/16") — skeleton parts
• 2x 36" balsa 3/16" square (spar caps + tail boom)
• 2x 12" balsa 1/8" round (pushrod guides)
• 24"x24" parchment paper (unbleached for style)
• Scotch tape + thin CA glue
💰 Total raw material: ~$12 USD.
Slides into an A4 envelope. Assembles in about the same time it takes to watch an FPV edit. Hand‑cut version requires patience; laser‑cut would be even faster (but where's the fun in that?).
Battery location and motor details. We'll shuffle the VTX and RX to dial in a static margin around 12–15%.
Now that the frame is sorted, it's time to model the avionics — RX, VTX, camera, servos, wiring.
Then the big question: glider or twin EDF?
🌬️ Pure thermal | ⚡ Twin EDF
Two paths. One airframe. Decision pending.
Thanks for reading, aviators. More experiments (and probably more questions) next week. If you're following along, grab some balsa and a coping saw — let's see what we can build without plugging anything in.